
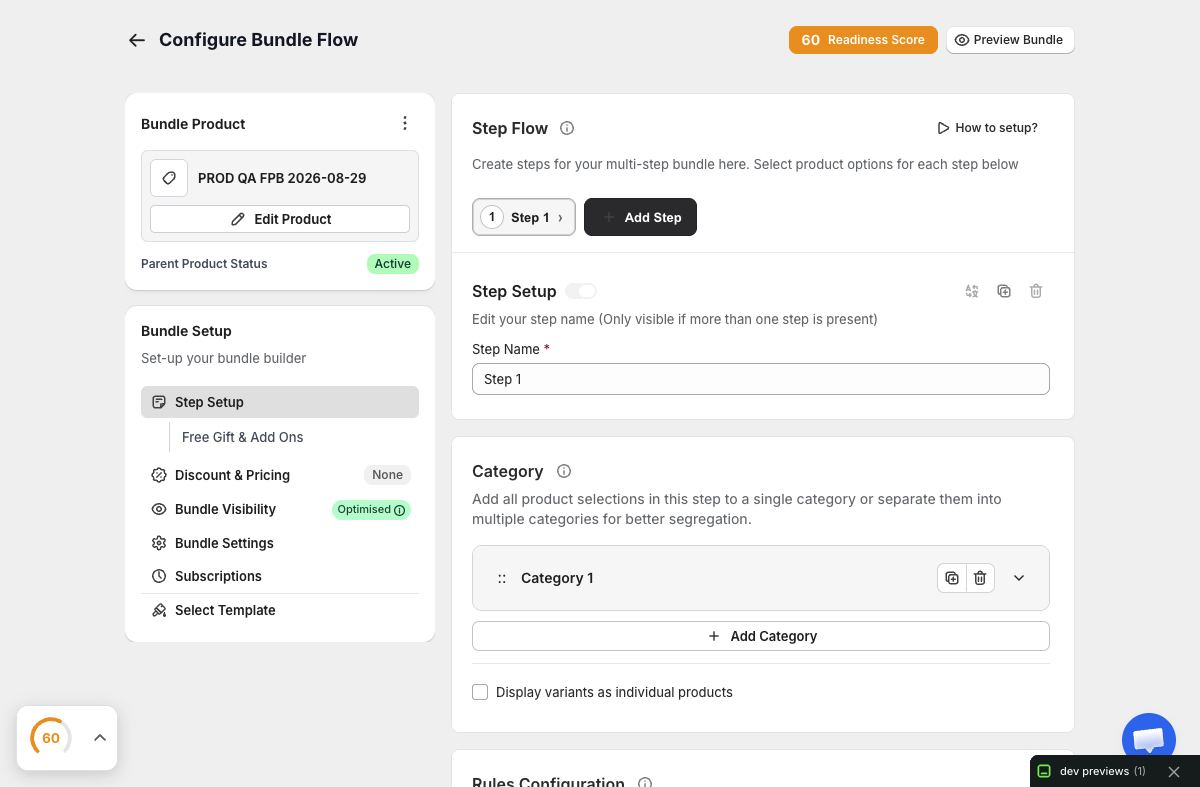
What you’ll build
You will build a Full Page Bundle that leads customers through a sequence of decisions, keeps progress understandable, and finishes with a reviewable bundle summary. Full Page Bundles are well suited to routines, gift boxes, meal selections, sample sets, and kits where the bundle deserves its own destination.
The finished experience will have a deliberate step order, products grouped by customer intent, quantity rules that can always be satisfied, and a dedicated storefront link. Shopify remains responsible for the underlying products, variants, inventory, cart, and checkout.
Before you begin
Sketch the journey in plain language. Write one sentence for each decision: “Choose one base,” “Add any two treatments,” and “Pick a finishing accessory.” If the explanation needs several conditions, simplify the offer before configuring it.
Prepare each product in Shopify first. Confirm product status, images, variant names, prices, and availability. Because the purchased lines are real Shopify variants, a vague title such as “Default Title” or an unavailable variant will surface in the customer journey or cart.
1. Create the Full Page Bundle
Select Create Bundle, choose Full page bundle builder, and continue. Add a clear bundle name and introductory copy. The title should tell customers what they are making; the subtitle can explain the number of choices or the main reward.
Do not create a separate Shopify Page just to host this bundle. Full Page Bundles use their dedicated storefront route. The surrounding active theme still supplies the storefront context, while the app embed enables the bundle runtime.
2. Turn decisions into steps
Open Step Setup and create one step for each meaningful decision. Order them from foundational to optional. A skincare routine might begin with cleanser, then treatment, then moisturizer. A gift box might start with the main item and end with a note or accessory.
Use short step titles and explicit instructions. “Step 2” is less useful than “Choose two snacks.” Customers should know the rule before selecting a product. Avoid duplicating the same decision across steps simply to create a longer experience.
3. Use categories to reduce scanning
Categories help when a step contains products with different roles or when the assortment is large enough to feel noisy. Group products by language customers recognize—such as “Caffeine free” or “Under $20”—rather than internal vendor or collection names.
Add products directly when the assortment is tightly curated. Use collections when the merchant workflow truly requires Shopify-managed membership. Whichever source you choose, review the resulting products rather than assuming the collection is clean. A collection may later gain items that do not belong in this bundle.
4. Configure selection and quantity rules
Set the minimum, maximum, or exact quantity expected at each step. Test every boundary:
- With no products selected, the next action should remain unavailable and the instruction should explain why.
- At the minimum, the customer should be able to progress.
- At the maximum, additional selections should be prevented or clearly handled.
- Returning to an earlier step should preserve valid selections and recalculate the summary.
Make sure the number of available variants can satisfy the rule. If customers may choose multiples of the same product, test that path separately from choosing several distinct products.
5. Choose the presentation
Use Select Template to start with one of the available Full Page designs: Standard, Classic, Compact, or Horizontal. Template choice changes the shopping presentation, not the bundle’s product or pricing rules. Begin with the layout that best fits product count, image proportions, and instruction length.
Use the central Design workspace for brand colors, typography, and other available template controls. Check the preview states rather than judging only the empty first screen. Selected cards, disabled choices, validation messages, a long summary, and mobile navigation can expose issues that the initial state hides.
6. Configure the summary and optional pricing
The summary should let customers audit their choices. Confirm that product names, variants, quantities, prices, savings, gifts, add-ons, and the total are distinguishable. If the bundle has a discount, configure it in Discount & Pricing and test combinations with different source prices.
Keep discount messaging consistent with the actual rule. If a tier activates at five items, the progress message before five should describe what remains, and the completed state should identify the achieved saving. Never rely on the message alone; verify the computed total.
7. Prepare storefront visibility
Open Bundle Visibility and check the app embed status. In Shopify Theme Editor, enable the Only Bundles app embed for the active theme and save it. Set the bundle to the intended status. An unlisted bundle can be useful when only people with its specific link should access it; an active public bundle is appropriate for normal campaign navigation.
Copy the dedicated bundle link and add it to the storefront navigation, a campaign button, or another intentional entry point. Keep one canonical link rather than creating duplicate landing pages that compete in search or analytics.
8. Test the complete customer path
Open the bundle route in a fresh storefront tab with cache bypassed. Test desktop and an actually resized mobile window. Complete the minimum bundle, the maximum bundle, a mixed-price bundle, and a path where you go backward and change a choice. Then add the valid result to Shopify cart.
In the cart, confirm the component variants and quantities, discount result, final total, and any gift or paid extra. If selling plans are enabled, confirm every chosen component uses a compatible plan. Do not place a live order as part of routine content or visual verification.
Troubleshooting
The dedicated link loads without a builder. Confirm the active theme has the app embed enabled and saved. Then bypass browser cache before retesting.
A step is impossible to complete. Compare its minimum or exact quantity with the eligible in-stock variants. Review category membership and any product availability changes.
Products appear in an unexpected category. Check the saved product or collection assignment. If the source is a collection, inspect its current automated conditions and membership.
The total changes unexpectedly. Test the same variant combination without optional gifts, add-ons, or selling plans, then reintroduce one feature at a time. Confirm the chosen discount model matches the written promise.
Mobile feels crowded. Shorten instructions and product titles where appropriate, then evaluate a more compact template. Do not hide required pricing or progress information simply to make the screen appear shorter.
Final quality check
A strong Full Page Bundle is understandable before the first click, recoverable when a customer changes their mind, and accurate after it reaches Shopify cart. Publish only after the complete route—not just the Admin preview—passes those checks.